| “ | Both of you fall back, while I launch the final assault. | ” |
| — Barclay, before the siege of the King |
Lord Barclay (also known as the Hammer) is the main antagonist of Stronghold 2. He is also featured as an AI opponent in Kingmaker mode.
Appearance and personality[]
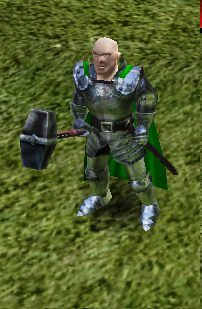
Lord Barclay is a tall and muscular man, with a deep voice and clean-shaven head. He is always seen wearing metal armour with a green cape as his military outfit. He wields his signature hammer in combat and occasionally a crossbow.
Barclay is a cold and calculating person, who prefers to employ strategy. He aims for political influence and does not hesitate to use force to implement his ideas. All-out fighting is not Barclay's preference however, as he does like to use his allies for his purposes. While Barclay does not work alone, he keeps his allies however on short leash and regulates them, if necessary. He rules with iron hand and barely tolerates opposition.
Biography[]
Barclay is an influential warlord, rivaling the King of England and topping all other dukes. He has a network of connections and subordinates working for him, who are granted land, money and sometimes troops for their services. Barclay's most notable vassals are Pascal Deveraux and Edwin Blackfly.
Lord Barclay intends to dethrone the King and make himself the new ruler of the country. He rules with iron hand, although he is not seen as cruel or vindictive among the folk. Barclay however is not hesitant to employ deadly force against his adversaries, and he gets his work done through clever political decisions.
Similarly to Olaf and the Bull, Barclay does not appear in the path of peace.
Path of War[]
Barclay encounters Sir William trespassing in his domain, who quickly sends troops on them. The garrison also tries to shoot him down from afar, but William gets away, as the bridge connecting the cliffs gets destroyed and cut off his stronger troops from them. Barclay is barely able to recognize the intruders, so he consults with The Hawk, who tells him to hire Olaf Grimtooth to try and finish Matthew and Sir William off.
In the aftermath, Olaf's efforts are nullified and the captive lord Sir Edwin is freed by Matthew Steele and William. Edwin starts plotting in order to dispose of the two, however he utterly falters and eventually starts losing estates, which he governs for Barclay. Desperate to halt any further loss of lands, he, Deveraux and Lady Seren take their armies and march against Steele to make justice.
Just before the siege, Lady Seren arrives. She comes up with an idea to arrange the surrender of the defenders, so as to avoid unnecessary battles. The two lords agree to it, however Seren's intention quickly unfolds, as she joins ranks with the defenders, turning her troops against them. Barclay and the Hawk deflect the backstab and try to overwhelm Steele's castle, however they cannot manage to. Steele's military talent immediately catches Barclay's attention.
After the siege, Barclay meets Steele's company at the crossroads. He tries to convince him to join him, with the promise of a great alliance ruling the country.
The Blue Path[]
Steele refuses Barclay's offer and leaves. Barclay and the Hawk turns their attention to Lady Seren for her betrayal, immediately marching against her Abbey. Seren charges Steele in defense of the Abbey, who stops the assault, much to Barclay's anguish.
Barclay must mobilize his troops once more, when his second-in-command the Hawk is slowly conquered in his own lands by Steele's war machine. The Bull and Deveraux leads a joint direct attack against Steele's fort, but Barclay intentionally decides to stay back, confident that the crown would be his with his primary competitors gone. When William and Steele kills the Hawk, he surrounds them with his army and threatens to kill them. Much to his annoyance, Sir Grey arrives with royal reinforcements. Grey manages to relieve them, however he is killed by Barclay with a crossbow.
As Barclay retreats to his castle, soon he is surrounded by Sir William, the King and Steele. Their forces start the siege after The Bull fails to stop them on the field and falls. Soon Barclay is overwhelmed and announces his surrender.
Barclay is taken away in a cart in front of the townsfolk along with Edwin. They both are humiliated in front of the King's counsel, as they are thrown vegetables at.
The Green Path[]
Steele joins the ranks of Lord Barclay and his alliance, although as a means to secure the crown for himself as he knows the two are dangerous men. He immediately uses his opportunity to share that the King must be residing at Seren's Abbey, once Barclay tells him that they intend to lay siege on it. Barclay assists Steele with some trebuchets, allowing Steele to move in and kill Seren. Barclay then attempts to force The Bishop to proclaim him king, but Steele, stating that everyone deserved a fair shot at the crown, instead insists on crowning whoever kills the old King, much to Barclay's disdain but he is forced to accommodate for the request.
To keep Steele occupied, Barclay advises him to deal with Sir William while he searches for the King's place of hiding and the Hawk stills the uprisings induced by Steele's attack on the church. Steele complies and over a war of attrition, he finishes William off. Eventually, the King's shelter is located. Barclay proposes to lead the final assault against the fortification, however Deveraux and Steele intends to get involved in the siege, which soon turns into a race for the crown. Barclay barely misses the crown, as Steele's forces deal the killing blow to the King. To his disdain and disgust, Barclay is forced to serve as Steele's vassal, swearing fealty to him alongside Pascal.
Castles and strategies[]
Lord Barclay is one of the most sophisticated AI opponents. His economic approach with his castle building skills and the use of powerful units makes him a hard nut to crack. Due to this, he is most vulnerable during the early-game.
Castle[]
Barclay uses a few castle designs with different-sized keeps.
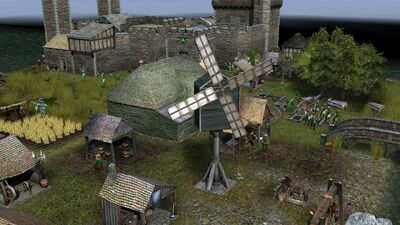
With a medium sized keep, Barclay keeps most of his production outside and makes a very small enclosure around his keep that hosts most stone wall buildings and all of his military production. A great tower is placed in one corner with a few archers and crossbowmen on it alongside a ballista. A second, smaller layer of stone walls are added outside the first for two layers of defense, with the gatehouse being covered in Man Traps. Swordsmen litter the entire area, including areas fitted with Rock baskets.
With a large sized keep, Barclay places two enclosures; one large enclosure that covers his keep and hosts all of his stone buildings as usual, alongside some general food production and granary. The main gatehouse is littered with man traps. A great tower and bastion are placed across from his keep that house several archers and crossbowmen. Barclay adds a second, significantly smaller enclosure around his campfire that is protected by two square towers which are filled with a few ranged units. A stairway provides quick access to the walls (or vice versa); due to the ease of which opponents could breach from this direction, more rolling logs are placed closer together.
All layouts usually include an Oil Smelter with several engineers operating it.
Economy[]
An extensive economy is built by Lord Barclay, covering all raw materials and food types in terms of production. Wine and vegetables are served for the Lord's kitchen. If Barclay starts off with a large keep, he will place a bedchamber and supply cloth for additional honor gain. An inn is built to provide bonus popularity to counter taxes. Compared to the other lords who use non-lethal options to deal with criminals, Barclay is the only one who uses lethal options to quickly restart production.
Unit compositions[]
Barclay's units are all-round, powerful and deadly in a combined-arms strategy focusing on heavy firepower. Barclay has a habit of replacing mercenaries with normal units once they are killed off.
- Defense: archer (guarding walls), swordsman (personal defense), knight
- Harassment/estate force: horse archer, catapult, fire ballista
- Offense: outlaw, crossbowman, knight, catapult, battering ram, trebuchet, mantlet, cat
How to deal with[]
Offense[]
Barclay's castle is usually littered with swordsmen around the castle grounds. The medium sized keep is slightly harder to siege over the larger keep as the garrison is more clumped, ballistae are present on towers and the wall layout is confined that laddermen have difficulty setting ladders in place. Rather then use laddermen, it is recommended to use catapults to break the walls open. Avoid the gates as they are often littered with man traps.
The larger keep is easier to siege as only one layer of walls has to be breached as a stairway is placed on this wall line allowing direct access to the castle. While Barclay tries to remedy this with rolling logs, he also has several buildings haphazardly placed outside making their effect limited. A large number of swordsmen will be waiting both inside and outside the keep but should pose little threat to most players.
Defense[]
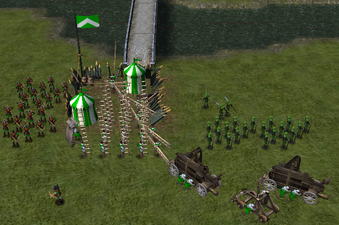
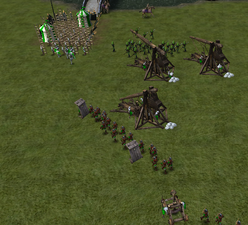
Barclay's siege forces are usually smaller compared to other lords, but he utilizes a large number of artillery (including trebuchets) to make up for it. The attack force usually consists of four or eight knights, 15-20 crossbowmen and 15-20 outlaws along with three trebuchets, two or three catapults, a battering ram and several laddermen. The knights are tasked to kill enemy lords.
Due to the slow speed of unmounted knights, the crossbowmen and outlaws will be the first to arrive. If possible, take out as many of them before the knights arrive as Barclay will begin his siege once they get in position.
Quotes[]
For the Kingmaker quotes of Lord Barclay, see: Lord Barclay/Quotes
Gallery[]
| Kingmaker | Sir William • Sir Grey • The King • Lady Seren • Edwin • The Hawk • The Bull • Olaf • The Hammer The Queen • The Bishop |
| Campaign-only | Matthew Steele • Friar Jacob • Constable Briggs |
